| Kit |
Fujimi Mazda RX-7 A-Spec |
| Kit# |
03465 |
| Price |
€26,90 |
| Decals |
One option |
| Reviewer |
Arno Smulders |

History
Eversince I saw the movie "The fast and the Furious" I got hooked on beautiful customized cars.
Therefor I thought it would be nice to build a model of one for myself. The choice of which
car I wanted should have been easy, since every car can turn into a streetracer. But soon it
became clear to me, that only a few whould have the looks I wanted. Eventually I came home
carrying a bag holding the Mazda RX-7 A-Spec by Mazdaspeed.
Construction
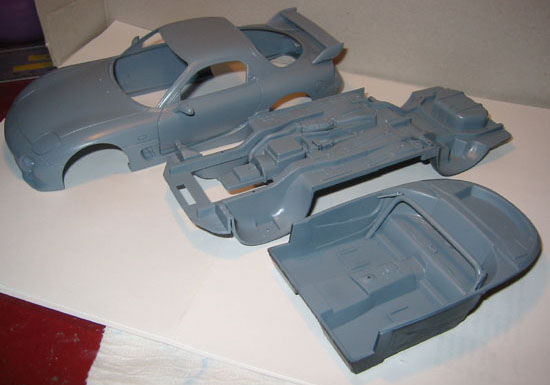
As with my last Fujimi box, the sprues were individual packed in plastic bags. The entire car
was made of a glossy black plastic and a lots of clear parts.

Very little flash was found on the sprues and the flash I did find, was easily removed.
There were some tiny mold lines on the body and the wing, but the rest was in a good state.
Exterior
Since this kit was chosen for it's looks, the exterior didn't need much of extra modelling.
The sideskirts and mirrors were placed as mentioned in the manual. I drilled out the mirrors
so I could place a small piece of copperwire to make a stronger construction. In stead of the
A-spec rear wing, I chose another bigger wing. In the nose, self made racing mesh was added,
to give the car an even more sportive look.
The A-Spec exhaust was also replaced by a twin endpipe. This required adjusting the piping
underneath the car.
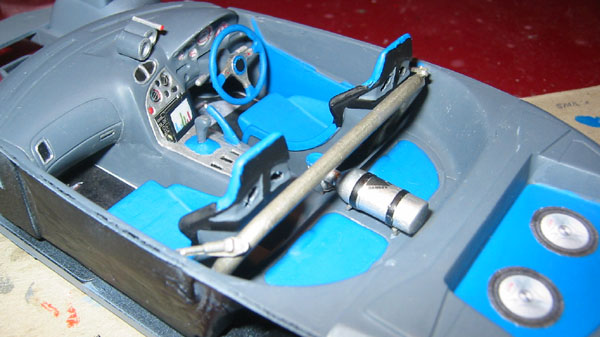
Interior
I started out thinking of a nice and bright colour for the interior. Since this was to become
a streetracer, I wanted an eye-cathcing interior. I decided to dress it up as sporty as possible.
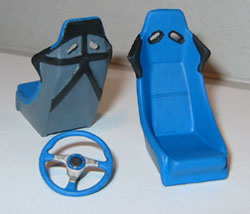
The kit had a special A-Spec steeringwheel, but I went for another steering wheel, which was
marked as redundant. This steeringwheel looked like one I found on the Sparco website and
this inmediately gave me the right colour scheme for painting the interior.
As I was surfing the Sparco site, I saw the Sparco seats. The seats of the RX-7 also looked
like the Sparco seats I found. An indication was found on the seats were normally the harnas
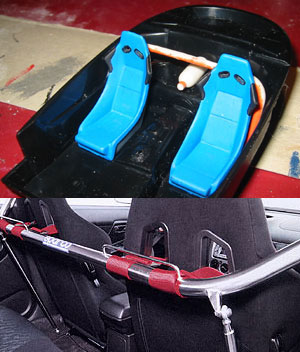
would go through and so I decided drill out those holes.
After the seats were done, I dry fitted them and glued a harnessbar in the cockpit. (Later on
I will attach the harnasses to this bar.) On the backseat a NOS canister was placed including
a tap and hose. This gives the impression that this car can boosts its power upto 230+ km/hr.
After the undercoat was done I started working on the interior and constucting the extra
guages, NOS bottle straps, tap and hose, speakers, TFT display, car mats and ingition.
The gauges were made of plastic
sprue in which I drilled holes. In the holes I painted the displays. On top of one gauge
I glued a small shift light.
The TFT display was made of two layers of transparent plastic card. I painted a bar graph in
between and glue the pieces together. This gave a shine display like appearence. The backside
and a trim on the front were painted flat black. The entire construction was attached to the
dashboard with another small piece of sprue, just underneath the radio.
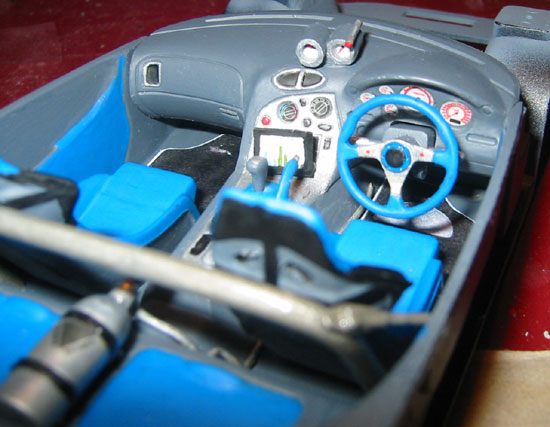
At the final stage of the interior, I bought and placed foto-etched speakers in both doors and
a tiny igition key in the steering column.
Paint and Decals
When the body was cleaned I applied a nice layer of Testors Gray Primer. Also the interior
and coachwork were primed.
After priming I started painting the interior. I used Gloss French Blue and Dark Gull Gray
for the entire interior. I painted a layer of transparent flat paint onto the blue paint.
The dashboard and several other details were painted with Aluminium and the harness bar was
painted in Steel.
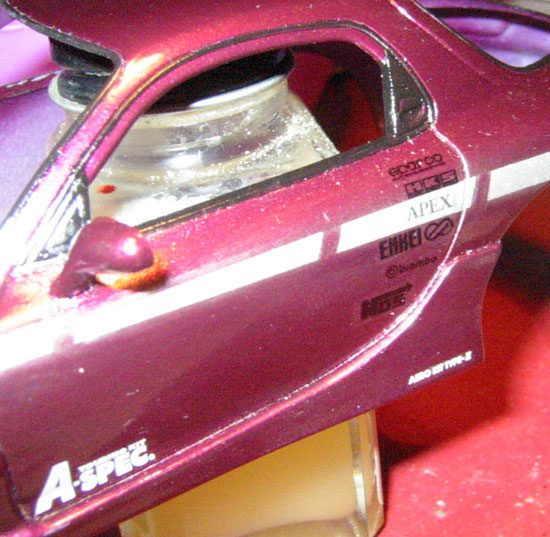
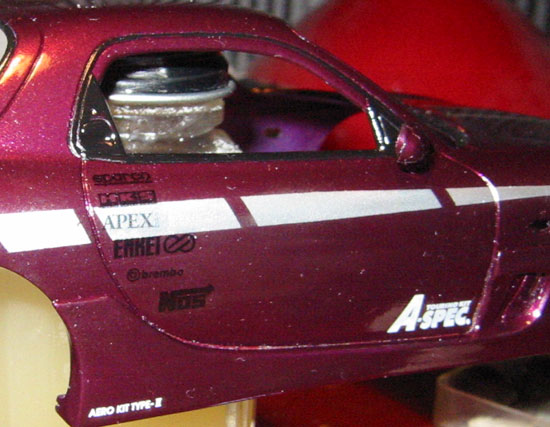
The exterior was painted in a pearl purple, which was painted in real car paint, provided
by a good friend of mine. The paintjob was done in about 3 to 4 layers. Afterwards, both
the nose and the sides of the car were detailed bij self designed and painted stripings.
Besides some minor dust particles, I was pretty pleased with the result. Now it was time
to put on some decals.
The decals provided with the Fujimi kit were very good, but I wanted some more. Since this
was to become a streetracer, I wanted it to have decals of several performance and tuning
manufacturers.
To create my own decals, I used a product called SuperCal. After intens research and
information exchange with other SuperCal users, I decided to give it a try. With a bit of
trial and error I found out that black decals on transparent decal paper was the best choise
for my Mazda. The decals were easy to apply and nicely followed the aft trim of the doors.
With all decals in place, the entire car was given two layers of gloss coat, which gave some
extra depth and shine to the purple lacquer.
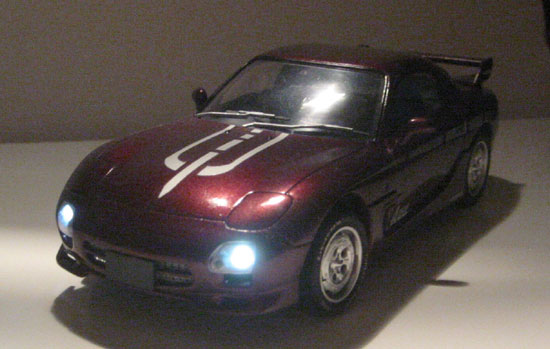
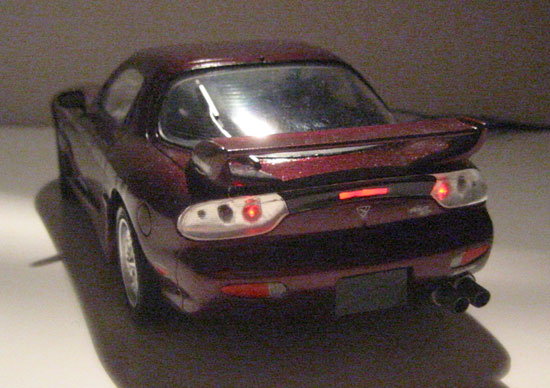
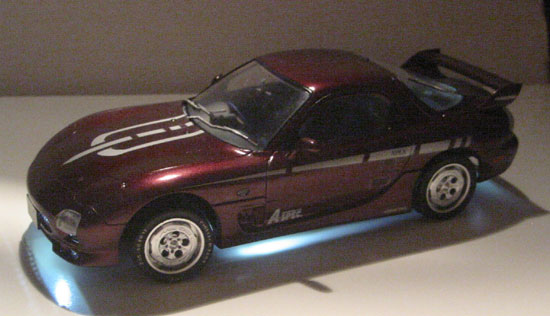
Lighting
With all the conversions and detailing to give this car a racers look, I needed something more:
Neon! To create a neon glow underneath the car, I needed to install LEDs. When I discussed
the use of LEDs in my car, my neigbour convinced me to light up the entire car with working
signal, head, rear and break lights.
An order went out and several days later I received the following LEDs:
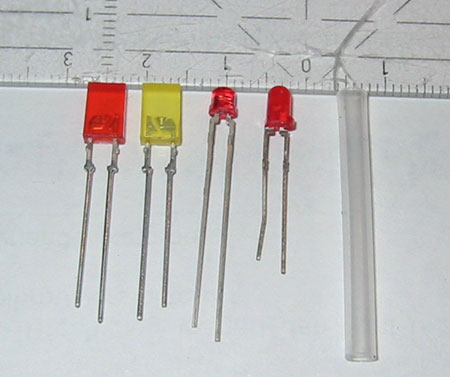
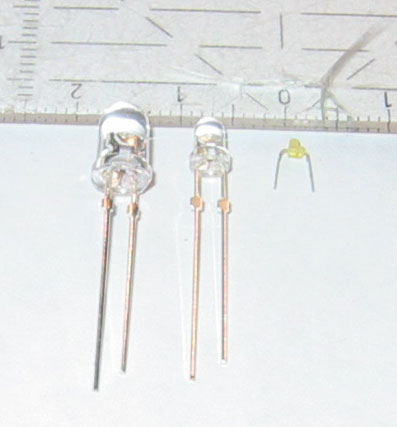
After carefully stuffing all wiring inside the car's body, I lit the lights one by one, showing
all those beautiful lights.
Conclusion
This Fujimi kit fitted really wel, resulting in this beautiful vehicle. Adding my own
streetracers look was really fun to do and it fits the car well.
The options on this car were plenty and therefor I can advise this fujimi kit to all who
wish to build a streetracer or just simply build the Mazda RX-7.
Sources
The Mazda Speed website
Official USA Sparco website
Official APEXi website